

Here are directions (courtesy of HGTV.com) if you'd like to try on your own...
Materials Needed:
- small wooden table
- tape measure
- pencil and notepad
- 1x2 wood trim
- drill
- wood screws
- porch and deck paint
- paint sprayer
- floor sealer
- extension cord
- plastic sheeting
- drop cloth
- table saw
- orbital sander
- sanding pads
- damp rag
In a well-ventilated area, cover floors with drop cloths and surrounding walls with plastic sheeting. Measure available floor space on either side of bed to determine necessary width and height of finished nightstands; jot dimensions down on notepad with pencil.
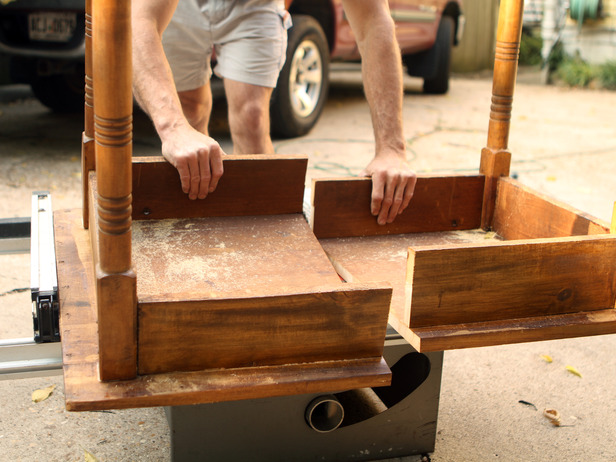
Cut Table to Size
Referring to dimensions on notepad, mark table to correct size with pencil. First, if necessary, cut legs down to proper height using table saw. Next, use table saw to cut table in half. Cut Table to Size

Sand and Prep for Paint
Remove existing finish and rough edges with orbital sander using medium-grit sanding pads. Remove dust and sanding residue with damp cloth.
Apply New Finish
Pour porch and deck paint into paint container portion of paint sprayer. Attach container to sprayer and apply an even base coat to table, keeping about eight inches' distance between table and sprayer to avoid paint buildup and dripping. Allow at least one hour for base coat to dry then apply a final coat.

Seal New Finish
After thoroughly cleaning paint sprayer of all traces of paint, pour floor sealer into paint container portion of paint sprayer. Maintaining a distance of about eight inches from surface of table, spray on an even coat of floor sealer.
Create a Cleat
Measure width of table and transfer dimensions to 1x2 wood trim with pencil. Cut trim to size with table saw.Create a Cleat

Install Cleat
Lean table up against wall where it will be placed. Use pencil to mark area below table's edge where cleat will be attached. Use drill to fasten cleat to wall with screws.

Attach Table to Cleat
Place table on top of cleat. Using a drill, attach table to cleat with wood screws from underneath. Tip: Match screws' length to thickness of table and cleat so screw tips don't penetrate tabletop.


No comments:
Post a Comment